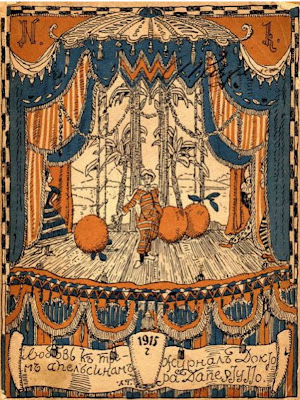
Sunday, September 22, 2013

The Complete Works of William Shakespeare [abridged]!

Hi everyone!

Hope you had a fantastic summer break! This year the fall play is The Complete Works of William Shakespeare [abridged] and the backstage crew and I are so excited to be here behind the scenes again! I'm also excited to bring you information about our tech crew process like I did last year, and I'll be sure to post as we go from sets to props to costumes to the final show.

Let's start with the sets.  William Shakespeare's original plays were produced in The Globe, one of the most fantastic and awe-inspiring theaters of its time.  Although it burned down, its legacy has influenced the way theater has been performed ever since.  With that in mind, it became one of our first inspirations for the set...

The Globe Theater
We also loved the charm and style of the Elizabethan time period, so the idea of an Elizabethan home also influenced our design.  Here's one of the pictures we used for reference:
An example of an Elizabethan home
With all this in mind, we started building the initial framework for the set! It's not anywhere near completed, but this is our first part of the facade:
The first glimpse of our set!
Hope you enjoyed seeing the initial part of our design process! Stay tuned for more posts about sets, props, costumes, backstage work, and more!

Tuesday, October 9, 2012

Lances and staffs and spray paint, oh my!

Over the past two weeks hazzahsword and I have been working on making some lances and magic staffs for the play.  First we took two five feet pieces of pvc pipe, some craft foam, paper, and lots of masking tape in order to make the lances. Once we shaped the tops, we covered the entire lance in masking tape. Then we spray painted one blue and the other orange.


                                         One of the lances before before it got spray painted


For the staffs, we again took five foot pieces of pvc, but instead of using crafting foam and tape, we took a field trip to the prop room. We went there to get some inspiration and some materials to make our beautiful creations. We found some mardi gras beads, a ball covered in shiny plastic, some rope, and a wooden ball. I was in charge of making Fata Morgana's (evil witch)  staff while Hazzahsword made Celio's (good wizard). We also had to make these stable enough for a battle scene, so we put wooden dowels inside the pvc, and then again attach the dowel to the top. Then we hot glued them together to ensure that they stay together. After all of this they are finally ready to be tested out tomorrow.


<-- Fata Morgana's
Celio's -->

All Set to Build Sets!

With the show fast approaching, tech crew had to work hard to finish the set on schedule.  Remember those pallets we were breaking last week?  Well, they're finally put to good use.  By cutting them to fit and screwing them onto the orange "walls", we could ease the brightness of the orange and create a more authentic commedia look. But that wasn't all we had to do...
MadHatter using the chop saw to cut scrap wood.

The finished set background.

The other side of the set background.
To mask the white platforms that raise the stage, we made these pieces of wood orange and later screwed on more scrap wood from the pallets.  Actors and techies alike worked on this project.  But wait...there's more!
Techie (left) and actor (right) work together to paint the set.

Finished cover pieces for the stage platforms.
For the curtains, we were looking for a ragged, beaten-down look.  For this, we used burlap and watered-down paint in paint-sprayers.  We will also add patches to make it look even more weathered.

The newly-painted burlap curtain, drying on the shop floor.

 And now, the (almost) finished product...
The (almost) finished stage installed in the black box.
As you can see, the stage looks pretty good (and orange!)  The burlap curtains look old, but are accented with orange fabric behind.  On either side are the "walls", looking boarded-up and ancient.  The orange gym mats on the stage are used for "lahtzee"--rehearsed bits of funny stage action that often involve falling or fighting.  The stage is raised up on those platforms with boarded-up sides, and the whole thing is put together in the black box for the first time.  But though it is now generally finished, we still need to clean up the rough edges and add the finishing touches to our hard work!

Stay tuned as The Love of Three Oranges enters Production Week!

Friday, September 21, 2012

When the Going Gets Tough, the Tough Break Pallets


This week we were given an impossible task--destroy this pile of pallets.  Yes, you read that right--a big part of tech crew is sometimes destroying things!  We are going to use the scrap wood for the sets of The Love of Three Oranges.  By nailing these boards onto some plywood, we can mask the back of the blackbox from the seats and provide that "commedia" look.  Commedia dell'arte was traditionally a traveling show brought around on wagons or carts, so the sets are minimal and rough-looking.  With this scrap wood, we can bring that same rustic look to the stage in 2012!
A traditional stage for Commedia dell'Arte.
The giant pile of pallets for us to destroy...

Techies using hammers and crowbars to rip the wood apart.

The finished pile of wood...FINALLY...
Stay tuned for more techie adventures!

Friday, September 14, 2012

From Box to Tree: A Transformation

This past week we have been given the job of creating a log for the scenes deep in the forest.  First we had to do lots of math to figure out the size of the plywood for the box.  Then we cut the wood using the table saw, and stapled it together with the pneumatic staple gun (do NOT try this at home if you do not have anyone supervising you!!!!!)
This is our base box.
Next we prepared the mixture for a "fabric mache"--a combination of glue, a stretching agent, water, and white paint.  We stirred the mixture a lot until it took on a consistency between yogurt and milk.  This will cause the fabric to harden into a bark-like shape.

MadHatter with the "fabric mache" mixture.
 Our next job was to give the log some form.  We ripped and crumbled pieces from a roll of heavyweight paper and stapled/masking-taped them around the sides. It doesn't look like much, but it gives the log shape so it no longer looks like a square box.

It may look like a pile of tissues, but just you wait!
 After making the box less "boxy", we ripped and dipped--that is, we ripped some old fabric into long strips, and then dunked them into the bucket of "fabric mache" mixture.  Then we stapled them over the  paper and crinkled it slightly to give it more of that bark texture.  We may have ended up with white, gooey hands, but we also ended up with the beginnings of a really awesome log!

Now you can see how this will be a log, right?
 This is not the finished product--there will be many more layers, and then paint!  To be continued...


Thursday, September 13, 2012

What does a Prop person do???

Here is a link to a great article that gives a little insight into the prop person's world.  Prop on!

NY Times Props Article

Tuesday, September 4, 2012

Today we began our design process for the US fall play.  All the designers and technicians sat around a table to read the show and discuss the design aspects.  The set designers have their work cut out for them this week.  Monday they have to have a basic ground plan and concept approved.